

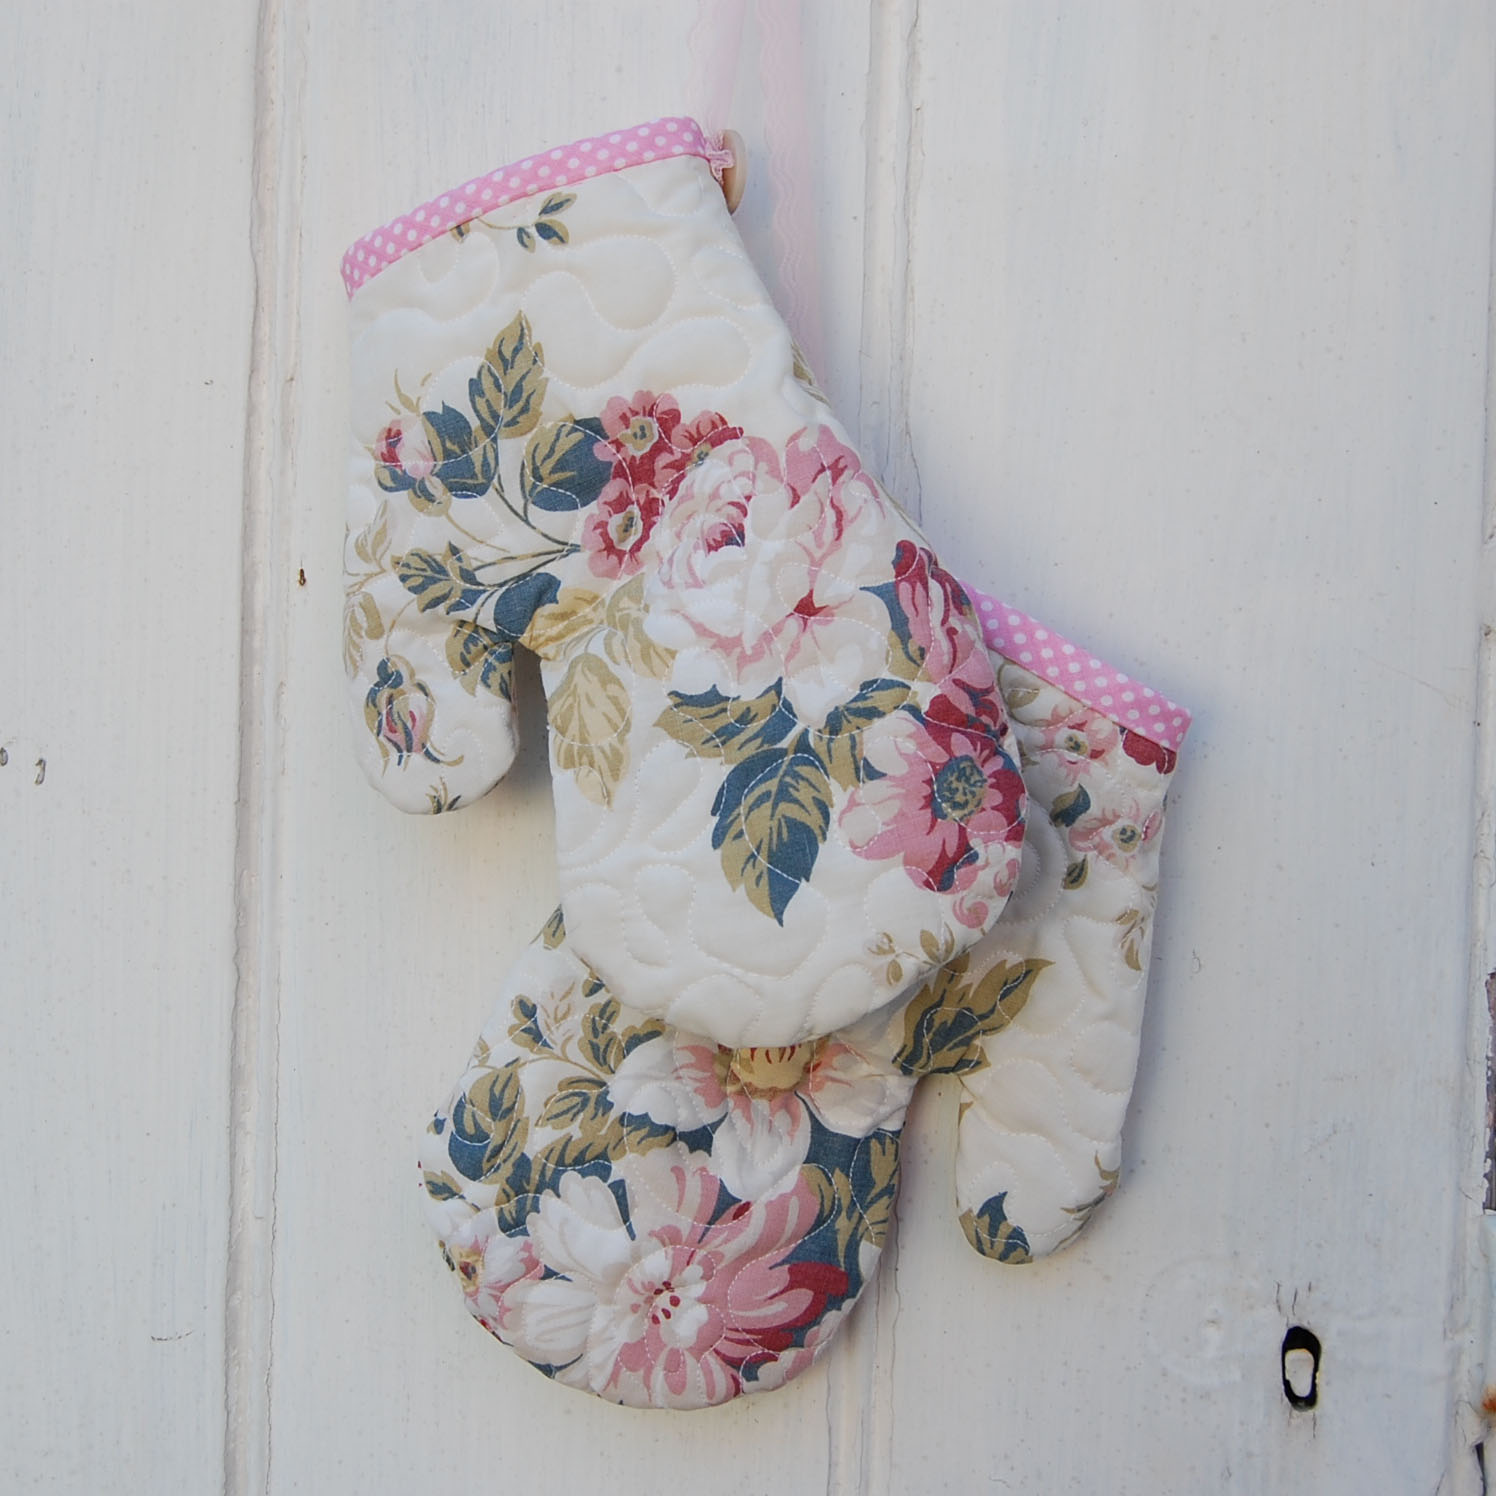
Vintage floral oven mitts
FORGOT TO ATTACH THE PATTERN!
WILL ATTACH TONIGHT
FORGOT TO ATTACH THE PATTERN!
WILL ATTACH TONIGHT
Are you ready to make them?

For one Mitt
1 fat quarter - for the outside and lining
or use to different fabrics
For 2 Mitts
2 fat quarters for the outside
1 fat quater for the lining fabric
Bias Binding - max 1m for 2 mitts
Wadding 1 fat quarter - although I use it a big bigger
1 meter lace/vintage/ribbon/tape - for hanging up your oven gloves
2 buttons - mine are vintage and odd

for one mitt
take your fat quarter and fold in half short ways so 18 x 22 inch becomes 18 x 11 inch
cut
from one of these piece cut the mitt shape out, you will have the front and back of the mitt
the other piece needs to be cut in half so you should have almost 2square 11 inch x 9 inch for the lining
for two mitts
lay your two fabrics together or fold a bigger piece, the fabrics need to be wrongsides together, so that the front and back of the mitts are the same size.

Next cut up the wadding, again I cut mine a little larger than the lining pieces
for 1 mitt you will have 2 pieces
for 2 mitts you will have 4 pieces

Next take one piece of lining fabric
lay it face down, unsderside showing, lay your wadding on top of this
Pin

Do the same for all pieces
They should look something like this

Now to quilt them
The easiest for all machines is to to sew straight lines diagnal about 1 to 2 inch apart
or if you have a free hand quilting foot then have a go
(I reccomend white cotton)

They now should look a bit like this
the reason I never cut the lining piece and wadding to size is you will never get it to line up
trust me!

Next trim back the lining and wadding, and you will end up with almost cute quilted pieces
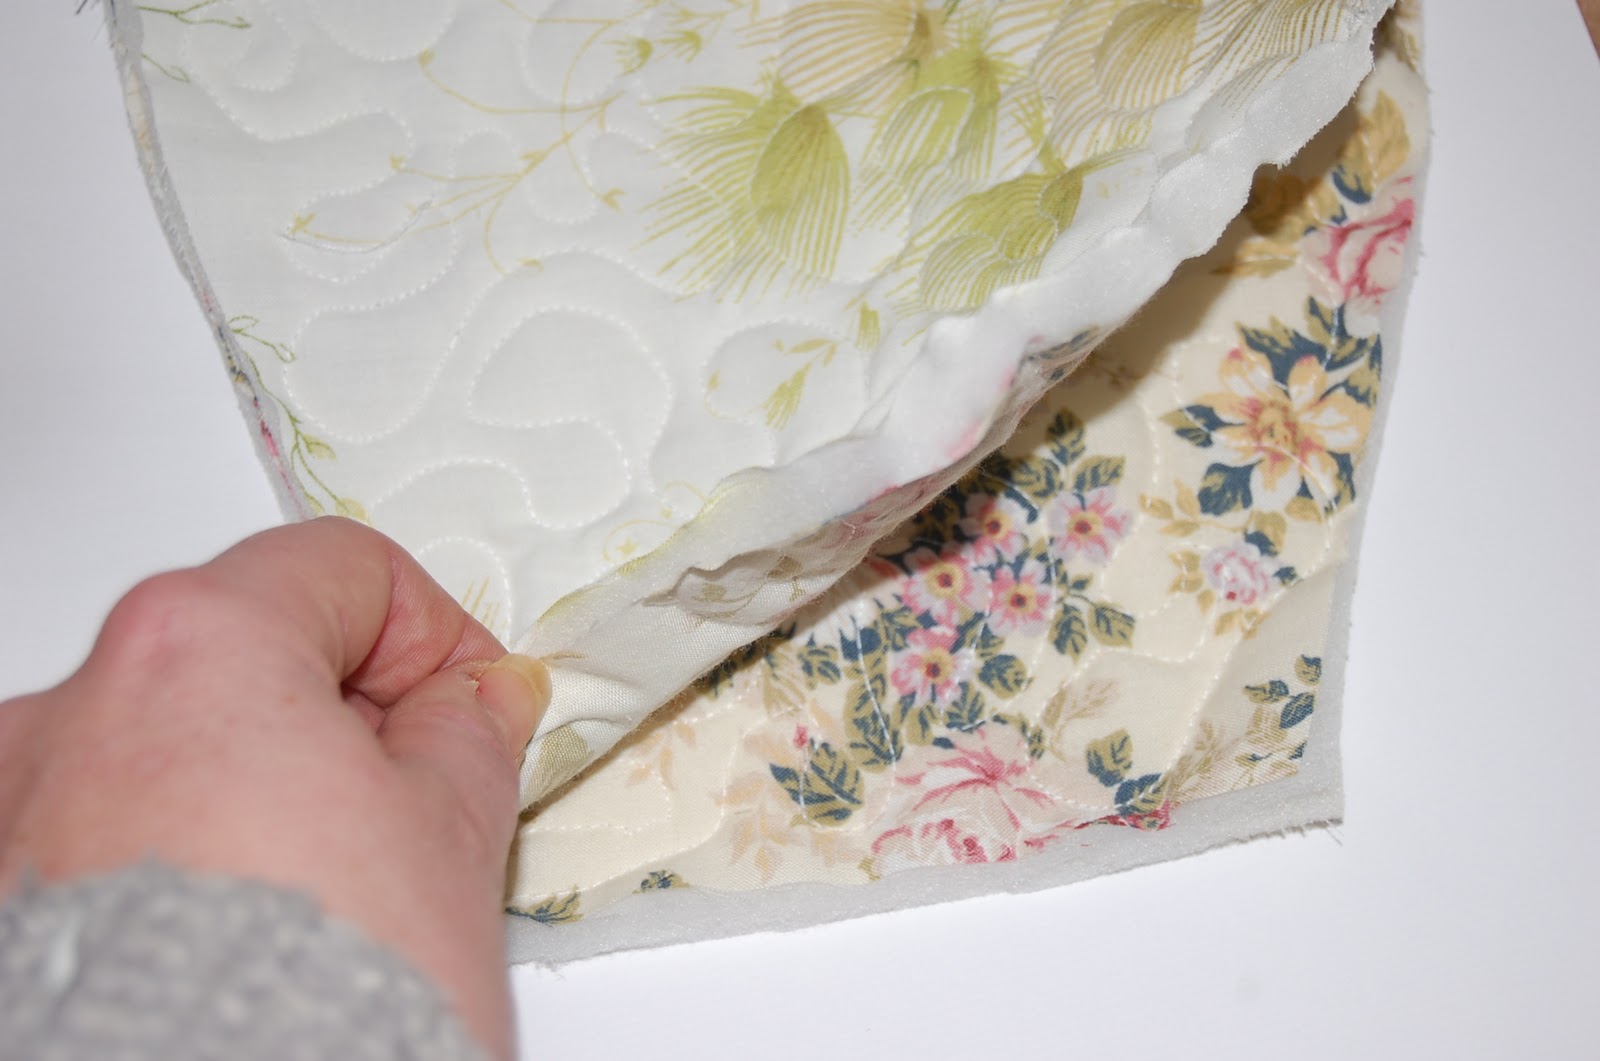
Next lay 2 pieces together lining on the outside and your best fabic pieces together
pin

Sew 1/4 inch around the edge, leaving the 'cuff' end unsewn
if cuff end uneven trim

Around any curves, snip to prevent pulling

And a tip when sewing the v shape for the thumb, sew as you see above
again the prevents the thumb looking to jointed and pulled
I can't explain but again snip in the corners of this v that is now a square U!

Turn oven mitt inside out
And if you forgot trim the cuff up

Attaching the bias binding
first open up one edge, fold back up to one inch, as per the picture
right side of the bias binding and right side of mitt
starting at the folded edge sew around where the fold would be
This picture shows that I have sewn allaround and am on the last step
sew approx inch overlaying cut the exccess binding off.

It will now look like this

Last step to blind stitch on the inside
Finally optional if 2 mitts take the long piece of ribbon sew each end each mitt opposite side to the thumb and a cute button on top

Ready to hang!
Tip
The cuff on this is narrow, so sew slowly when adding the binding as it does not fit around the sewing manchine base
Othwise enlarge the cuff to the same width as the top
But I like the look of these with the narrower opening.
Any problems let me know
and if you cant open up the pattern piece
You make it look easy. Will bookmark this for later date.
ReplyDeleteWent on to look at your oven mitts and spied your scrappy bird. LOVE THEM.
ReplyDeleteJen & Row
http://shimistore.blogspot.com/
Im going to have a go!! My oven mitt looks a bit shabby and a new one is needed!!!!xx
ReplyDelete